Edit Videos Like a Pro with these 5 CapCut Desktop Tips
By Anna Williams | February 17, 2025
Sometimes it seems that CapCut has thousands of tools to choose from when it comes to editing a video. With countless animations, effects, transitions, and filters, it can be difficult to edit videos efficiently.
But fear not! Here are five CapCut Desktop tips that will help you edit more efficiently and make the process feel seamless.
1. Keyboard Shortcuts
One of the biggest ways I sped up my editing was by learning and using CapCut’s keyboard shortcuts. Instead of dragging your mouse to different tools every time you need them, you can simply press a key to perform the action instantly.
Over time, those saved seconds add up, and your workflow becomes much smoother.
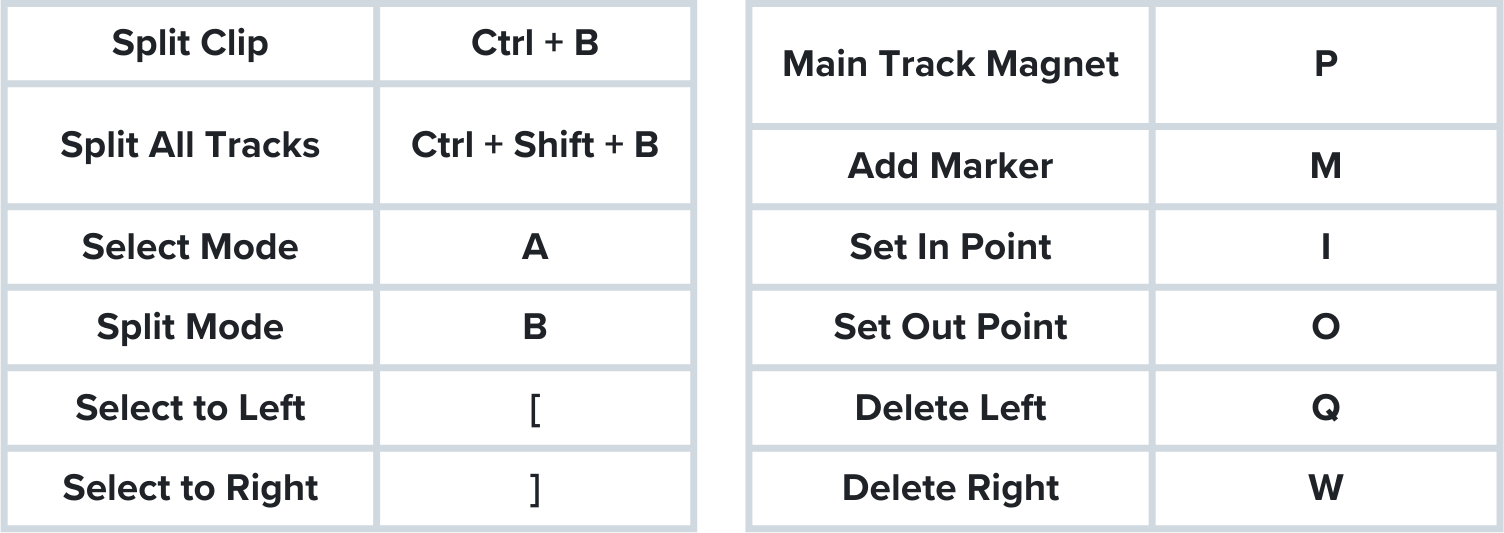
Here are a few keyboard shortcuts that can significantly speed up your editing process:
2. Filling Audio Channels
Have you ever wrapped a long shoot, imported your footage, and realized your audio only recorded on one side? Don’t panic! This is an easy fix.
First, open your project and drag the clip you want to fix into your timeline.
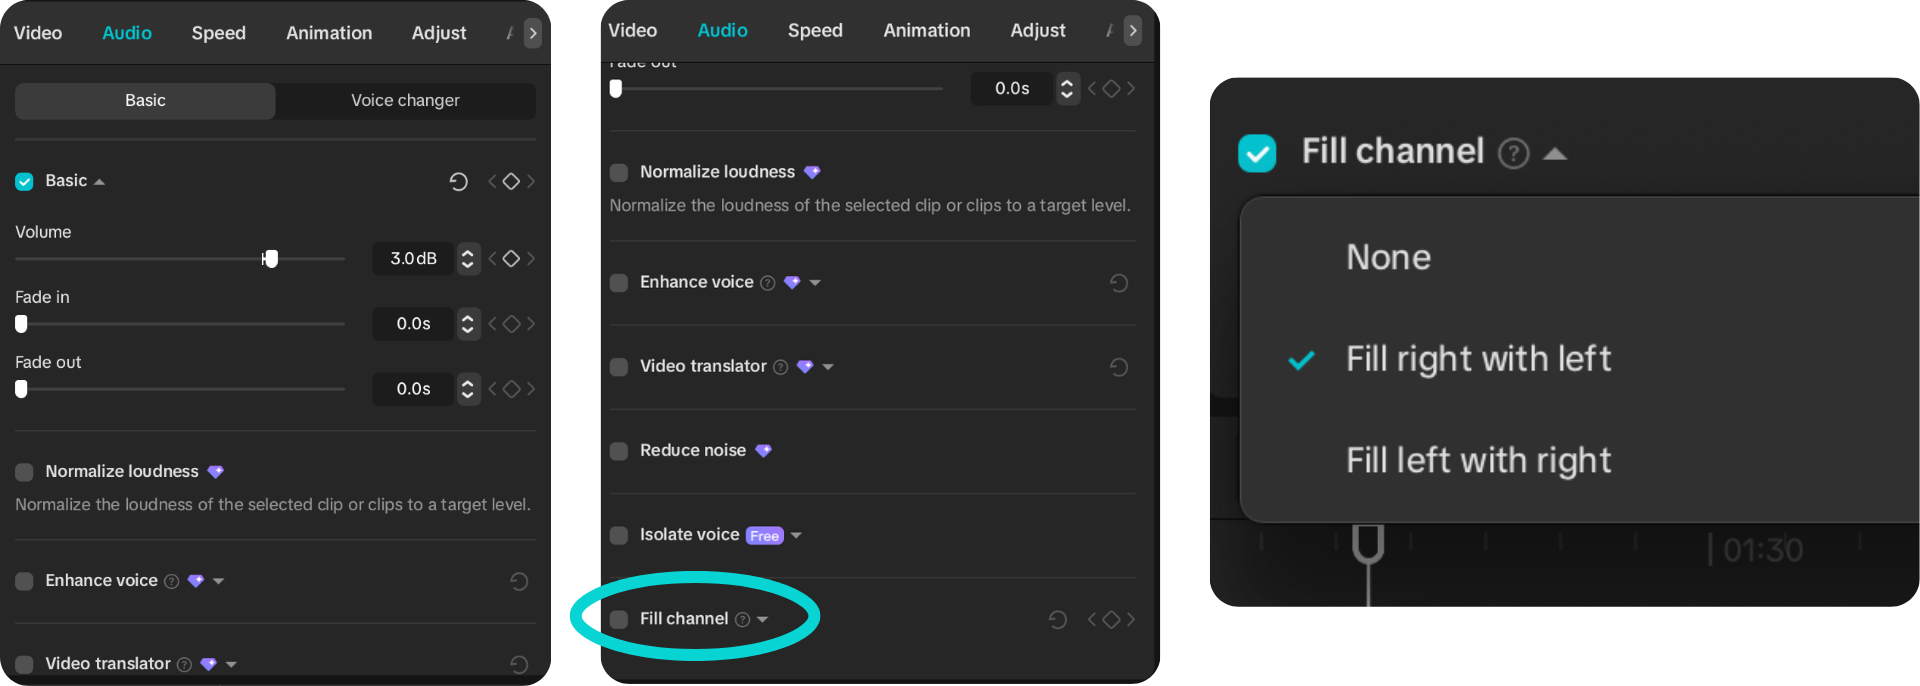
Click on the clip, then head to the “Audio” section in the right-side menu. Scroll down until you see “Fill Channel.”
This feature allows you to copy audio from one side to the other. For example:
If your audio is only playing from the left speaker, select “Fill Right with Left.”
If it’s only playing from the right, choose “Fill Left with Right.”
And that’s it! Your audio will now play evenly from both sides, saving you from having to re-edit or scrap the clip altogether.
3. Vertical Layout
One of my favorite features in CapCut Desktop is the flexibility of its workspace layouts. When you’re editing vertical content, it can be frustrating to squint at a small preview window while trying to fine-tune details.
Here’s how to level up your editing layout:
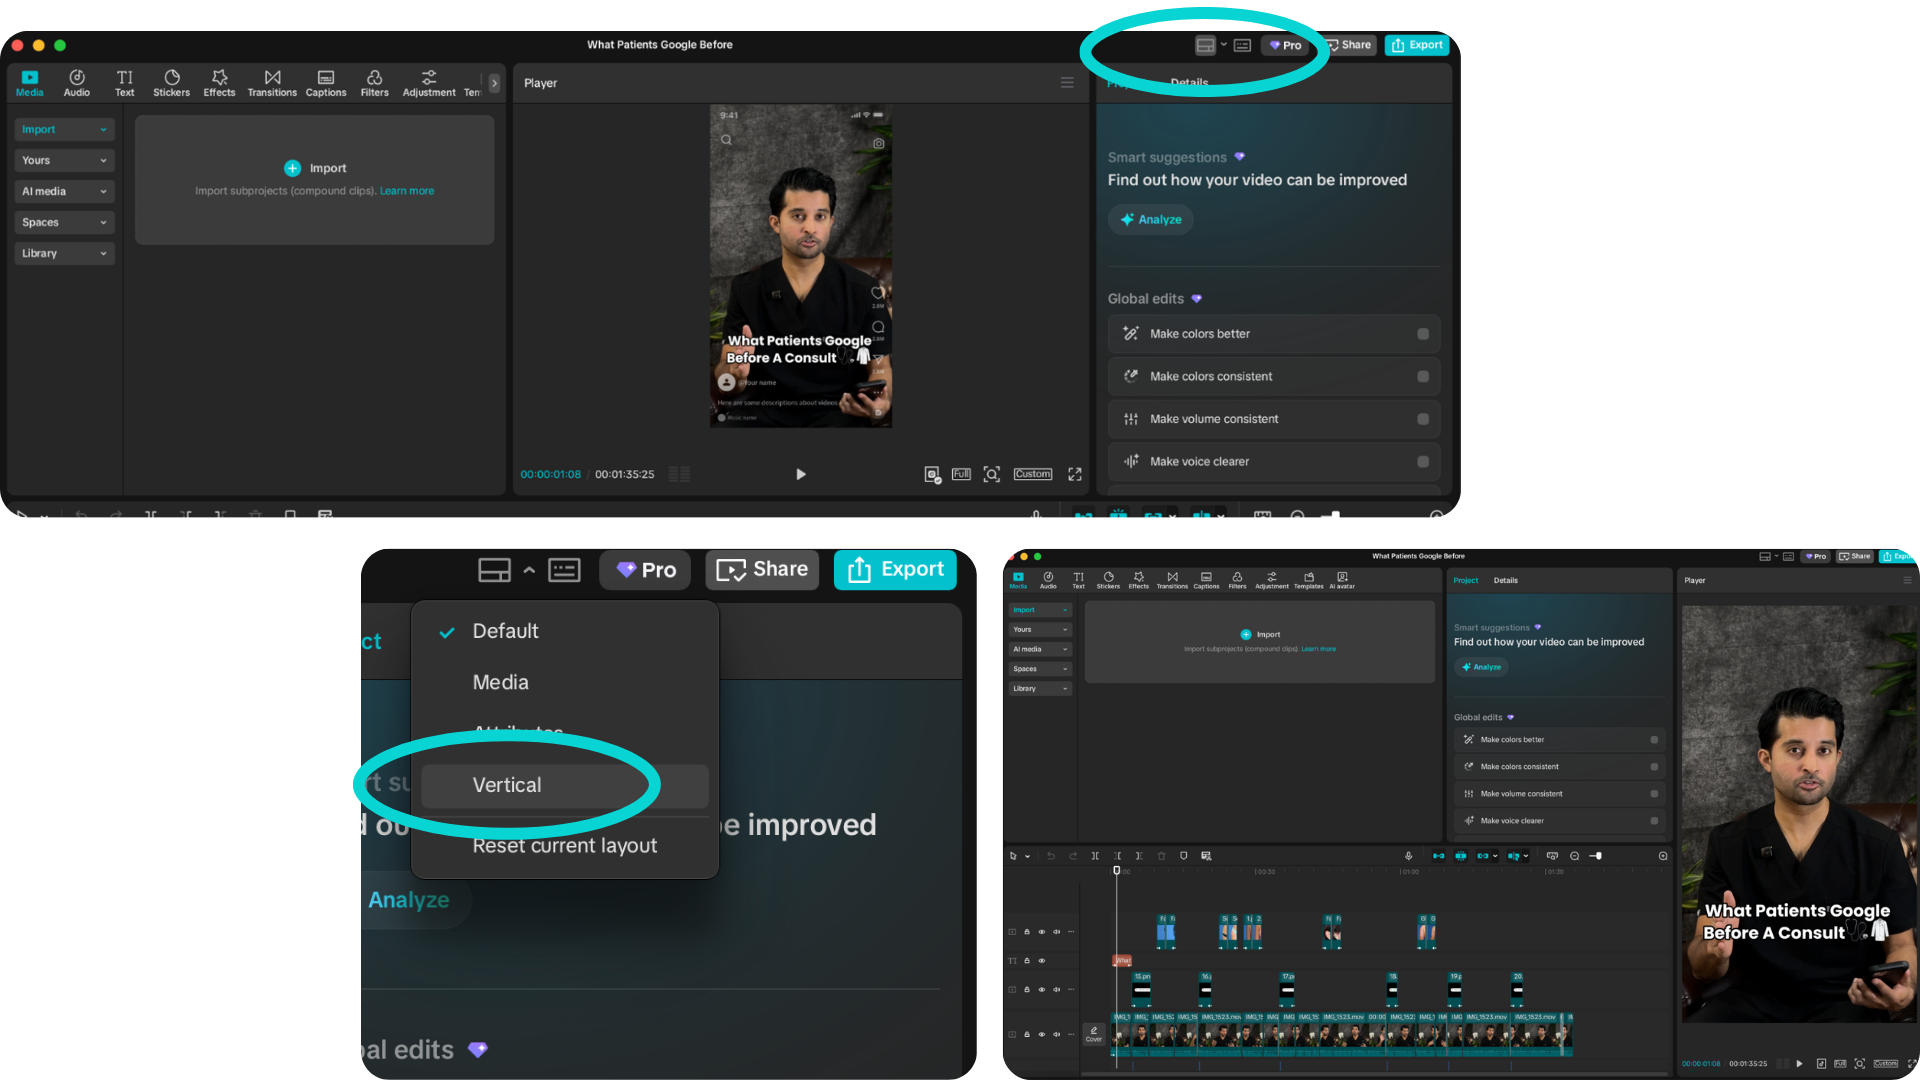
Open your project and head to the top-right corner of the screen. Click the layout icon (the one with three small boxes).
You’ll see five layout options. The one you’re looking for is “Vertical.”
While you can experiment with the other layouts, Vertical is especially helpful when editing for TikTok or Instagram Reels. Once selected, your preview window will expand vertically on the right-hand side, making it much easier to see your footage clearly during both editing and playback.
4. Social Media Platform Layouts
Another incredibly helpful feature in CapCut Desktop is the ability to preview your video within different social platform layouts while you’re editing.
This is especially useful for making sure your text doesn’t get cut off by Instagram’s interface or hidden behind TikTok’s captions and buttons. It also gives you a realistic feel for how your video will appear once it’s live.
CapCut Desktop offers preview layouts for:
Instagram
TikTok
YouTube Shorts
Here’s how to access them:
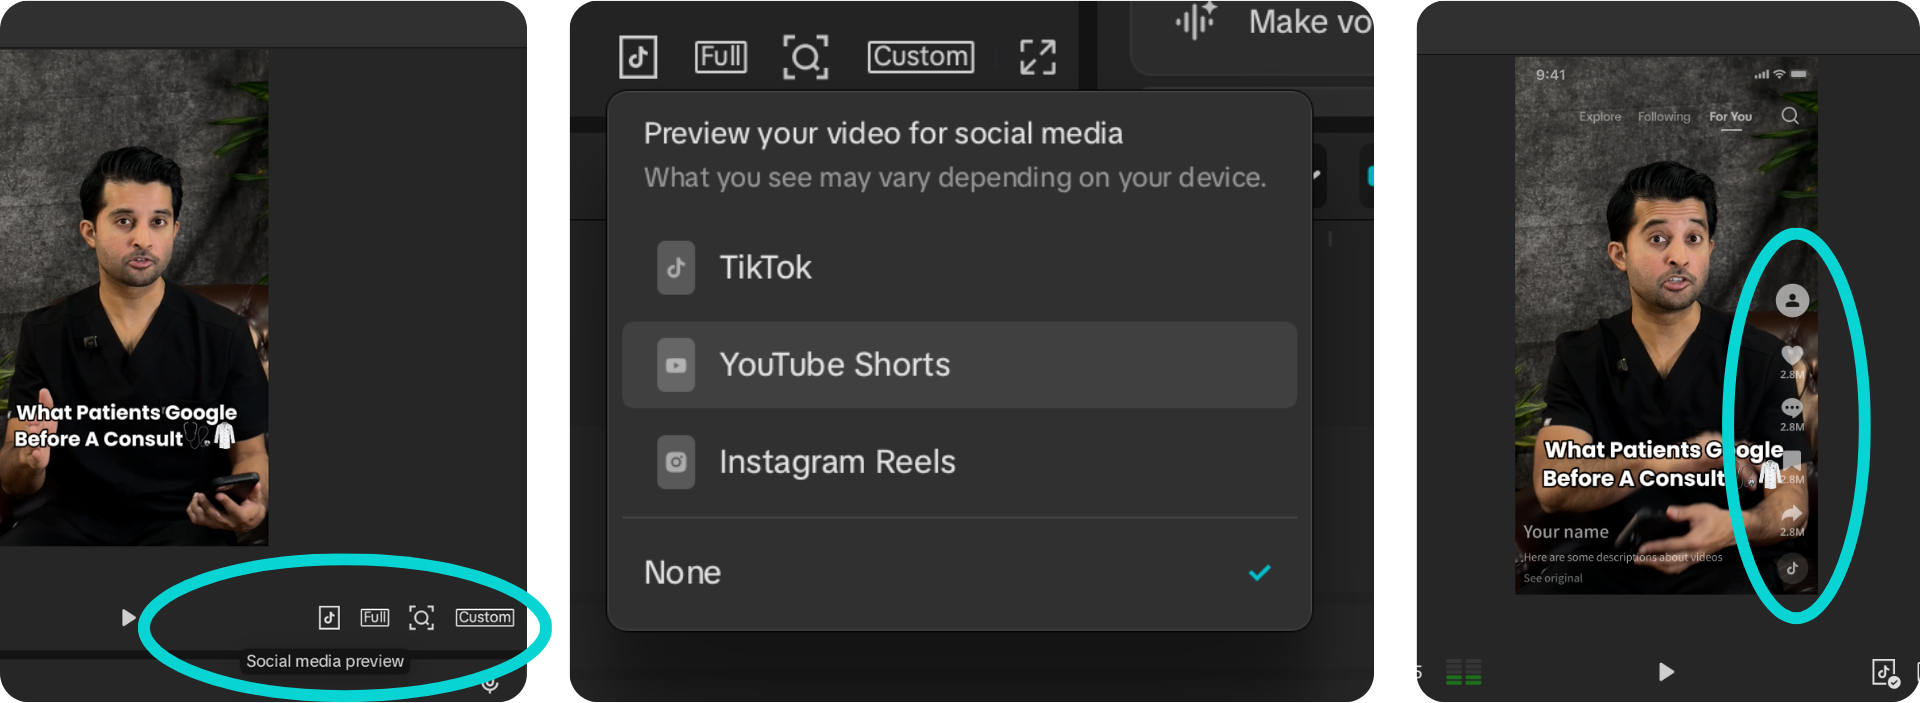
Open your project and head to the “Player” tab in the preview window (typically in the center of your screen or on the right side if you’re using the Vertical layout).
At the bottom of the Player tab, click the “Social Media Preview” icon. It looks like a small box with the TikTok logo inside it.
Once you click it, you’ll see a list of platform preview options. Select the one you’d like to use, and it will remain active while you edit and playback your video.
Don’t worry, this layout will not export with your final video. Think of it as built-in guides or rulers that help you design smarter for each platform.
5. Applying all changes at once
If you’ve ever needed to resize, adjust speed, or reduce noise on multiple clips, you know how time-consuming it can be to apply those changes one by one.
Thankfully, CapCut Desktop makes this much easier.
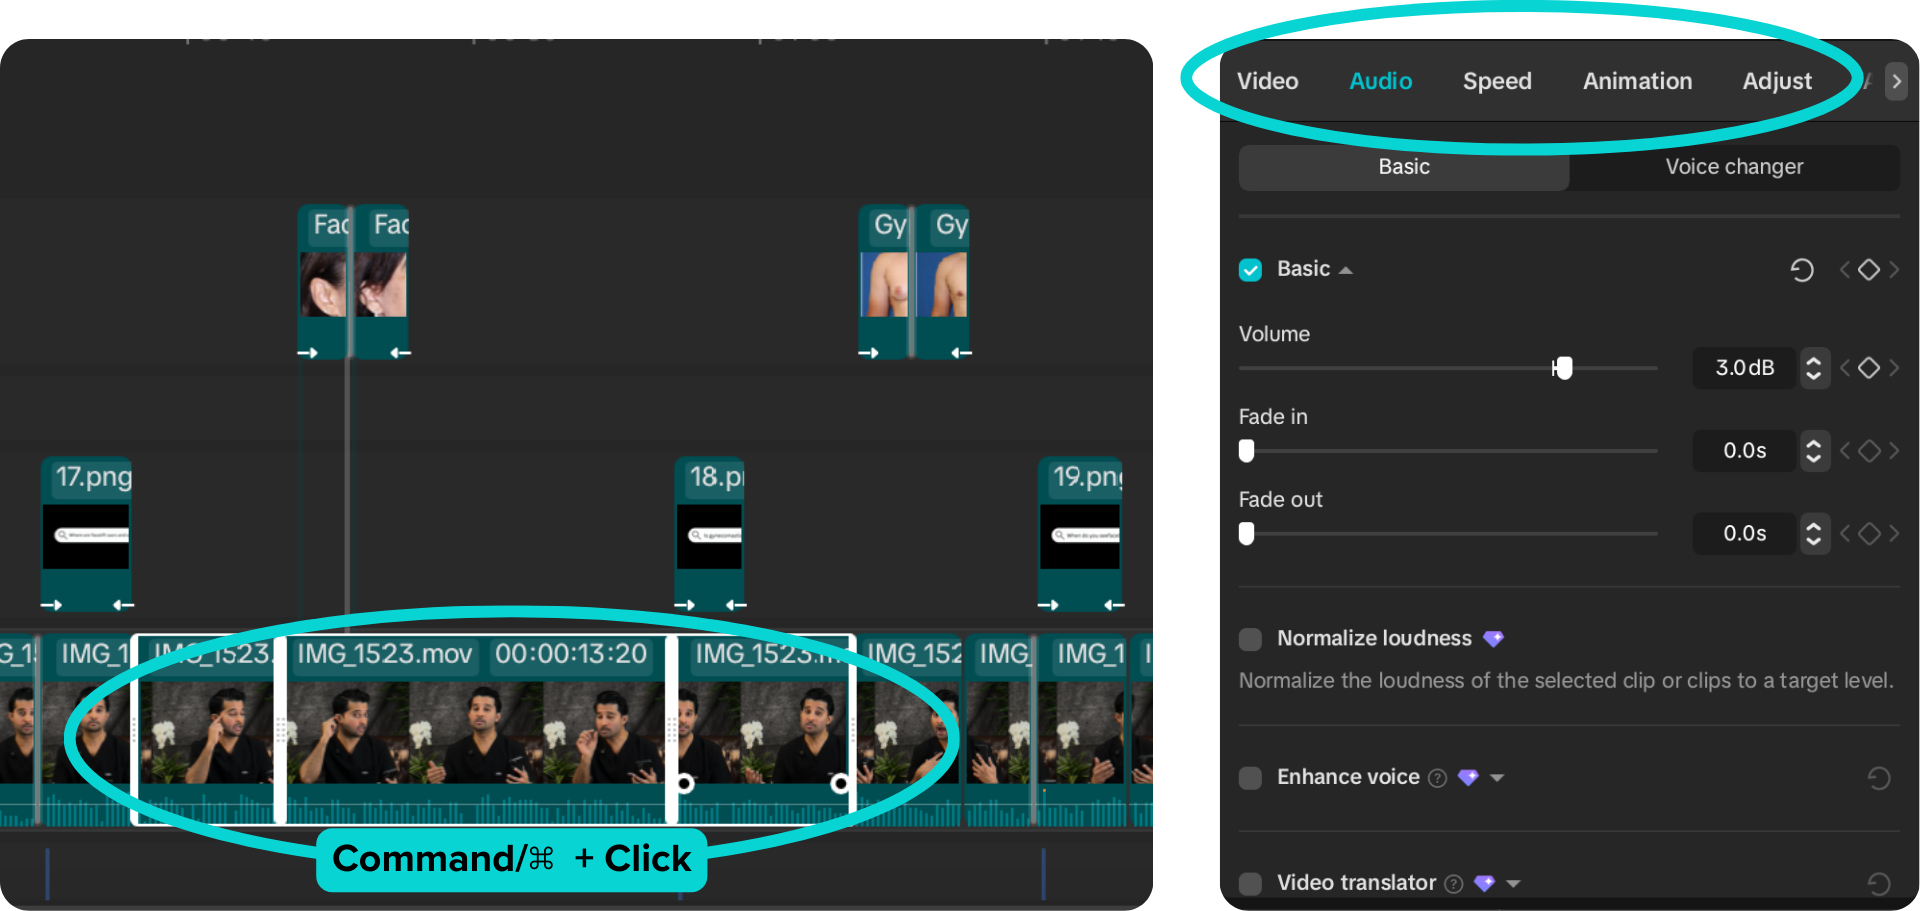
Open your project and click on the clip you want to adjust. Then, hold down the Command/⌘ key and click the additional clips you want to edit. You’ll know they’re selected when each clip has a white border around it.
Once selected, any adjustments you make will apply to all of the highlighted clips at the same time.
You can bulk-edit settings within the:
Video
Audio
Speed
Adjust
This includes things like resizing, color correction, brightness adjustments, sharpening, fading, and more.
It’s a simple trick, but it can save you a significant amount of editing time.
CapCut Desktop offers an impressive number of tools, and while that can feel overwhelming at first, learning just a few key features can completely transform your workflow.
From mastering keyboard shortcuts to fixing audio, optimizing your layout, previewing for social platforms, and applying edits in bulk, these small adjustments can make a big difference in both efficiency and final quality.
The more comfortable you become with these tools, the faster — and more confidently — you’ll be able to bring your creative ideas to life.
Happy editing! 🎬

ANNA WILLIAMS
Anna Williams is a Content Creator and Videographer at AMR Digital. When Anna isn’t on-site at a client video shoot, you can find her traveling as a triple-passport holder or spending her weekends at a movie theater as a proud former-theater kid.