How to Guide: Creating Seamless Instagram Pinned Posts
By Claire Sprague | November 25, 2025
If you’ve spent way too much time wrestling with your Instagram grid lately — cropping, realigning, and re-uploading pinned posts that still look off — you’re not alone.
Ever since Instagram’s new, taller grid preview rolled out earlier this year, creators and brands have been fighting the same battle: how to make “seamless” pinned posts actually look… seamless.
Sadly, the old square-grid tricks don’t cut it anymore. And because nothing is ever simple with these updates, getting truly seamless pinned posts takes a few extra steps. But don’t panic — this step-by-step guide will help you make pinned posts that look clean, intentional, and scroll-stopping again.
If you are looking for a silver lining, the benefit of the new grid layout is that the top “row” of your profile is more dominant now since the posts are taller. So your pinned content gets more eyeballs than ever, giving you even more of a reason to make sure they represent your brand well and look amazing.
Here’s Your Step-by-Step guide to Seamless Instagram Pinned Posts:
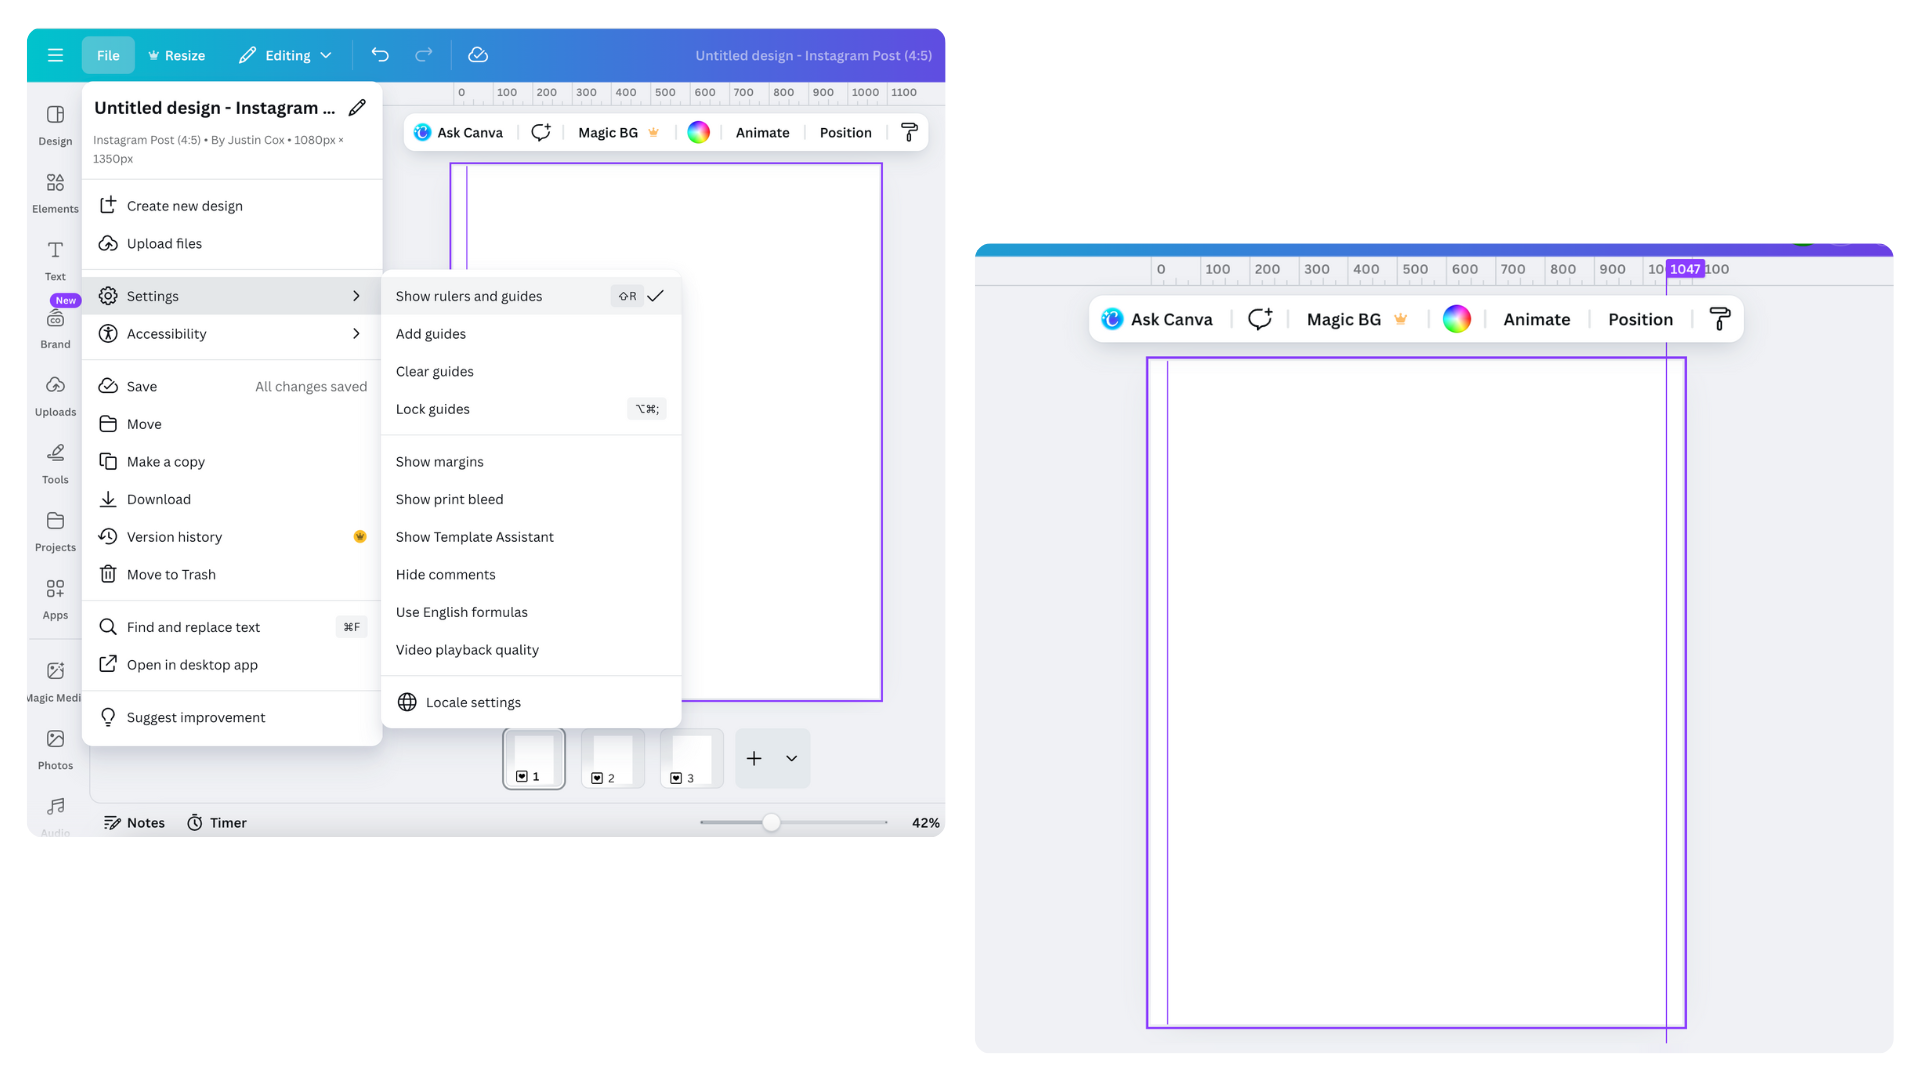
1) Set up your canvas correctly at 1080×1350 px per tile (vertical), you’ll need 3! I used to create a single image that I would slice horizontally, but that doesn’t work anymore — you’re making three separate posts (Left, Center, Right) that coordinate.
2) Create rule lines vertically at 33 pixels and 1047 pixels. Why? Because Instagram crops each post for the grid by 32.5 pixels, how annoying! Canva can’t do partial pixels, but nobody will notice the .5.
3) Next, design your first panel the way you want it to look! Include at least one element that will cross over to the second panel

4) On your first panel, add a rectangle to the top of your design (keyboard shortcut R in Canva) and then drag that rectangle to the far right side of your document. Then, make the rectangle 33 pixels wide by dragging the edge of it to your guide.
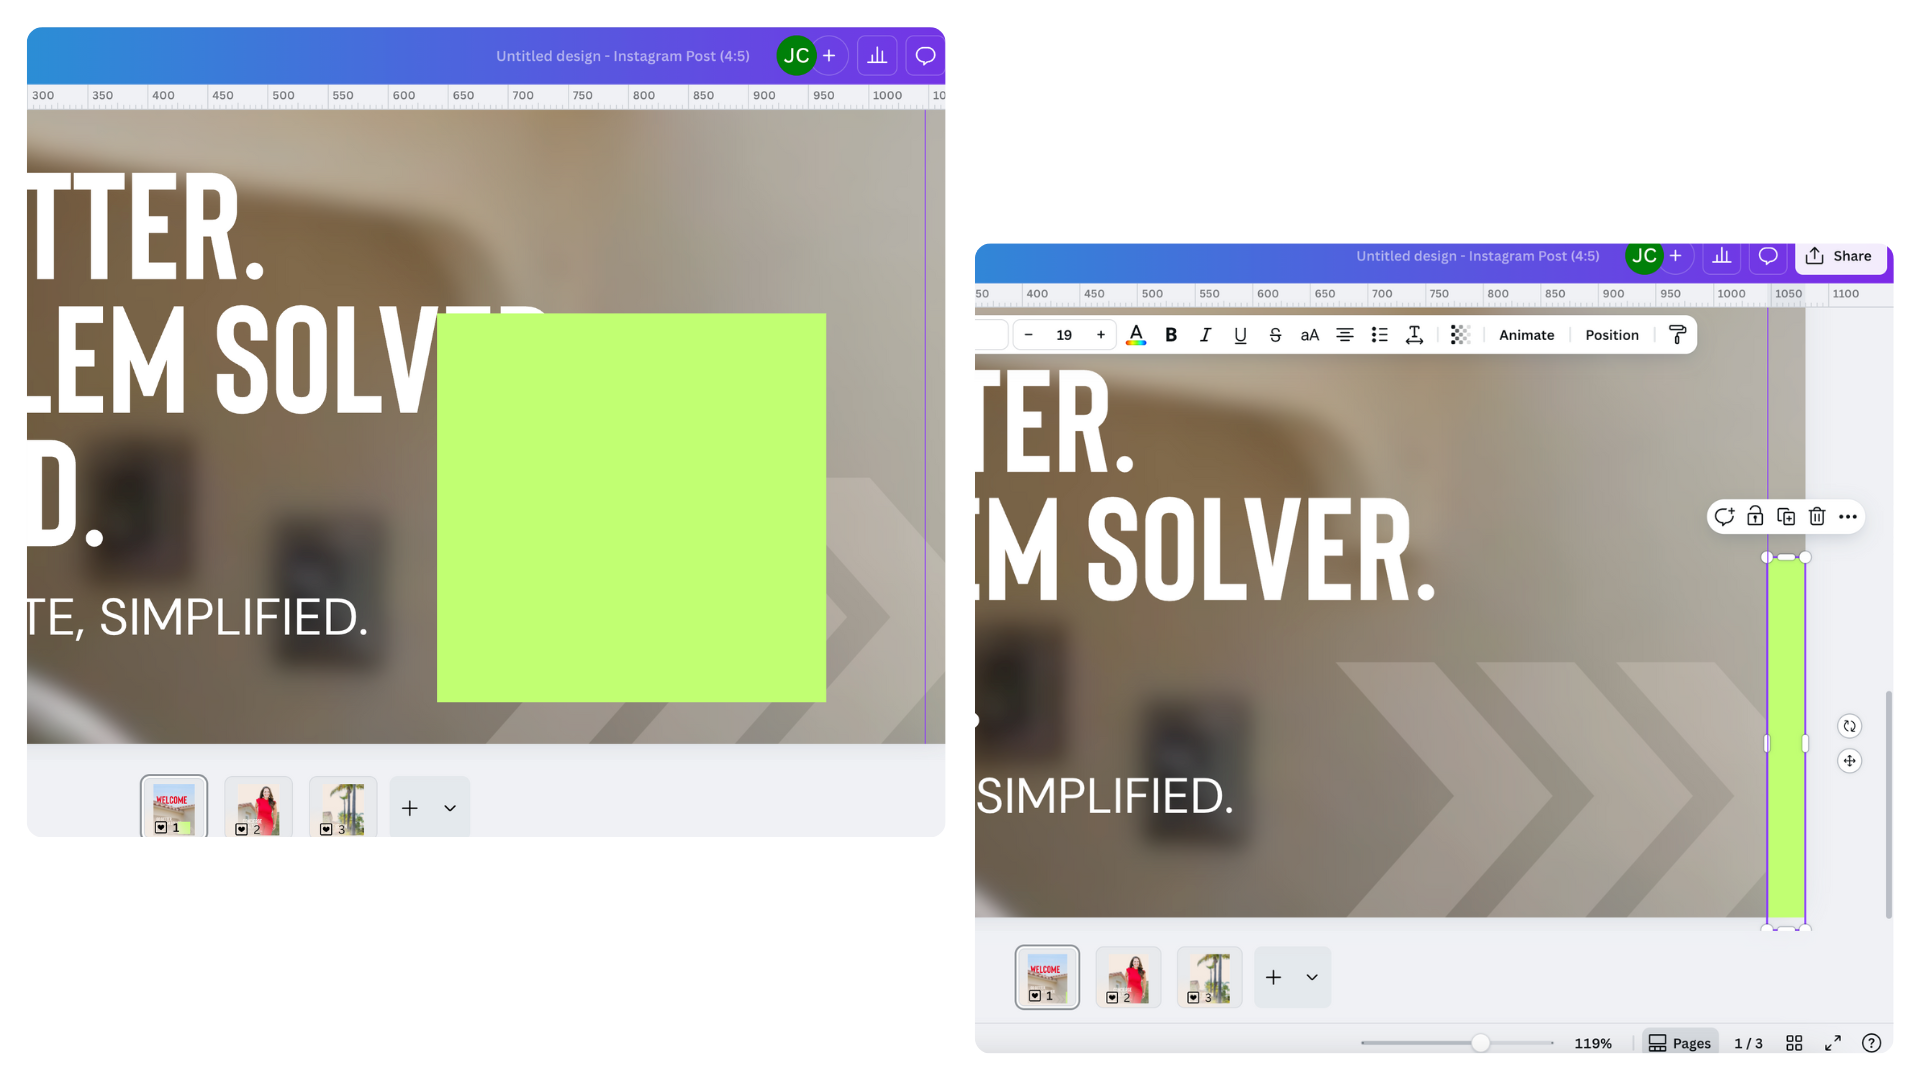
5) Next, select the object(s) that you want to overlap to the next panel. Hold Shift and select the rectangle. Now select Copy!
6) Move to your next panel and paste your selected objects. It will paste in the same place it was on your first slide, so now keep both objects selected and slide it over to the left side of the panel (remember to hold down the shift key while you drag so that you don’t move vertically!). Instead of sliding your two objects all the way to the edge of the frame, slide them so your rectangle meets the right side of your rule line.
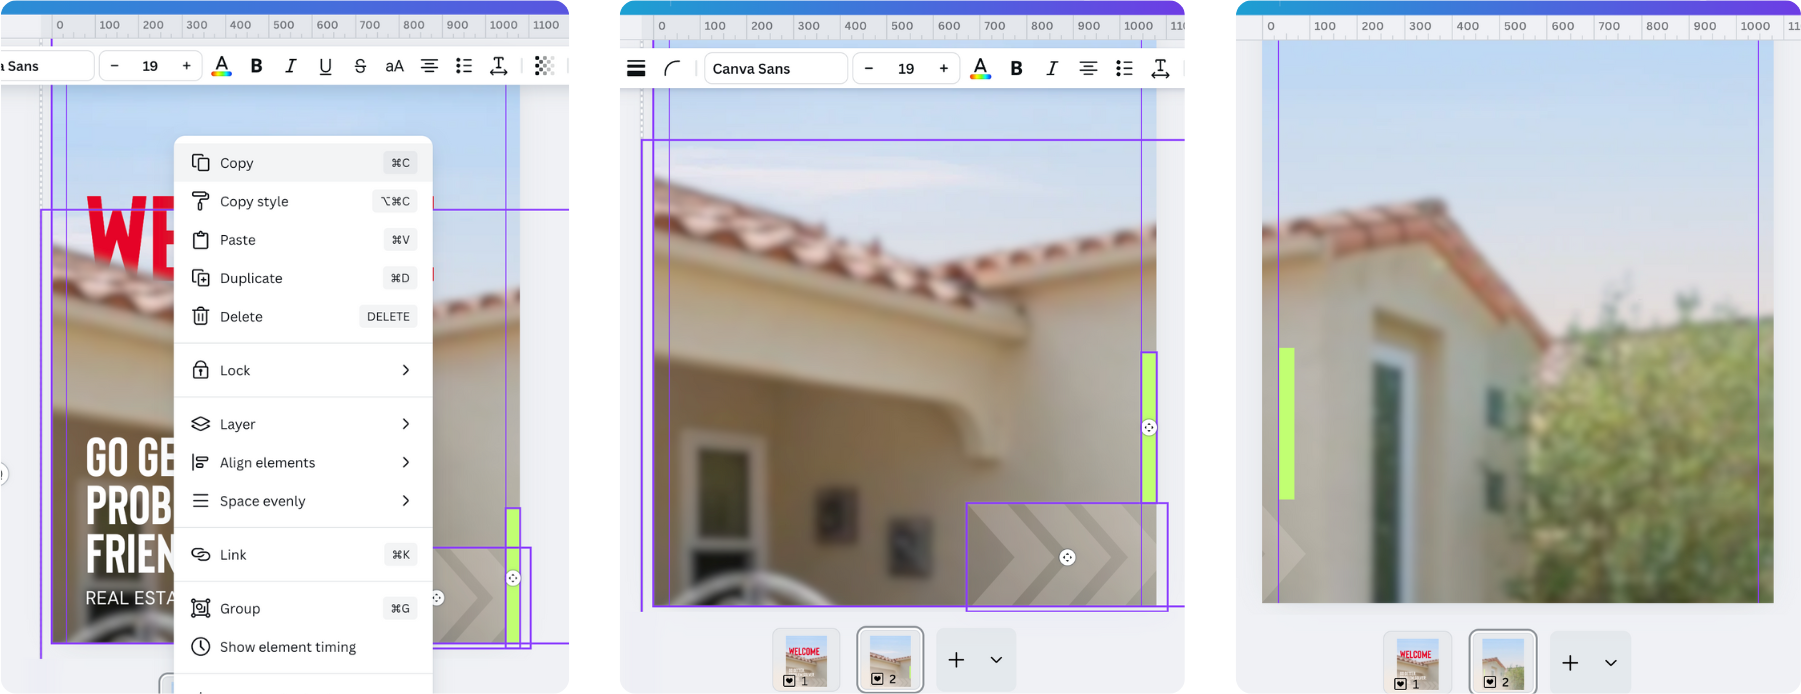
7) Now that you have your overlapping object perfectly placed on your second slide, you can delete the rectangle! We don’t want that to actually show in our design.
8) Now rinse and repeat! For any objects that you want to overlap between frames 1, 2, or 3, use this same method.

9) Export each frame as a single image.
If you are like me, you’ll want to see how this all looks before posting to your Instagram profile. I suggest building a preview mockup so you can see what they will all look like together. Create a frame 3240×1350 (that’s 3 × 1080-wide tiles side by side). Import each frame into this new document, and there you have it! If you want to tweak anything or want more things to overlap, this is a great way to preview how the pinned posts will look.

Here are some more pro tips to remember when creating pinned posts:
1) When you go to post these images, they will be 3 separate posts. Remember to post them in reverse order so they show up correctly. You can pin things in any order; however, this will help if you ever decide to unpin these posts, they will still display correctly lower in your grid.
2) Don’t put anything really important in the top right of your frame. That is where the pin icon will appear in Instagram. I prefer to have a clearer area there so people can see the pinned icon, and it looks clean!
Now you know the secret to creating a seamless pinned post. Need more help? AMR can take social media totally off your plate by making beautiful pinned posts and a whole lot more. Check us out and drop us a shout if you’d like to collaborate!

Claire Sprague
Claire Sprague is the Creative Director at AMR Digital, and a true designer at heart. When she’s not overseeing content creation for clients, she is on a crash course in becoming a #girlmom to her two young daughters. She also enjoys napping, working out, eating chocolate chip cookies, and napping. Yes, two mentions of naps because when you don’t get any, it’s all you can think about.